While I was organizing my latest reel I thought it would be fun to make some gifs of my work in the past few years. The first one and my favorite project so far at Method is Divergent. For the film I lookdev'd a cg dog and some cg ravens. Conveniently someone already made a gif of the dog that I did for the mirror room sequence.
The Dog
The dog was a pretty straight forward fur groom. Of course I used Houdini's fur grooming tools, not quite out of the box but customized for better control. The challenging part of this groom was the length of the fur and the fact that I had to match a live dog exactly. Long fur tends to have S shaped bends where the fur bends back on itself a couple times. To get this effect I combo'd direction, curl, and frizz attributes. It wasn't always a perfect S curve but it got close enough. The on set crew filmed a live dog but due to the complexity of the sequence and the infinite mirror reflection the environment, we had to supplement the further back reflections with a cg dog. This combined with the fact that I also had to do a jaw replacement for the dog in a few shots, half his face real half cg, and a few full cg hero dogs, the dog had to match perfectly. This just meant a lot of time with a line up camera going back and forth between the live dog and the cg one. I learned a couple of things on this groom. First was that its sometimes easier to to get precise coloring with painting color attributes in Houdini rather than relying on a texture artist. Since most texture artists don't have much experience with fur, they tend to just paint color patches where they see them. This is problematic with long fur though. Since the fur gets it's color from the root point attribute in Houdini, you have to paint the patches a little offset from where it's supposed to go. I found the feedback loop was much faster to handle this in Houdini rather than back and forth with a texture painter. When I say that I painted color attributes, I mean I painted masks on the geo and drove all of the color in the shader. I believe I had about 15 different mask attributes to drive patterning in this groom, from root and tip color to fades and solids. In addition to handling the shot lighting, the lighters also had to run the fur sims for the dog. Once I dialed in the sim settings, I created a system for the lighters to paint in areas of fur floppiness and a dial to easily control how much floppiness the fur needed in what area. In the end, I'm proud of how the dog turned out, I even got a full cg dog shot, the one in the gif above.
The Ravens
The ravens were a bit more technically challenging than the dog. I ended up using two fur systems and a feather instancing system for various areas of the bird. The easiest feathers were the ones on the head. Those are the finer feathers that look almost like fur. For that I used a straight ahead Houdini fur procedural. The body feathers were slightly trickier. They needed to look like actual feathers and the VFX Supe wanted them to be ruffled up as well. This meant that a displacement map wouldn't work as well as actual geometry. I ended up modeling about six feathers of varying sizes from curves in Houdini. I then made my own grooming system for instancing these feathers. I could paint direction and size and even had the control to animate the feathers raising and lowering on the back of the bird. From these attributes I used Houdini's fast point instancing to put these feathers on the birds at render time. It was a pretty efficient way of getting a really nice textural feel for the body of the ravens. For the wing feathers I modified the fur system to generate fur to look like flat wing feathers. This was a little tricky to do and I built off the work of some of my coworkers earlier feather jobs. In the past at Method, our earlier birds were modeled with curves and I was the first to use the fur procedural for them. Part of the system required grooming every feather to the right shape. Since then, I've modified my feather system on later jobs to use modeled outlines of feathers to derive the shape. The system worked pretty well and the render times were fairly reasonable, though when we got up to 15-40 birds in the frame at a time, some of them full frame, renders started taking a little longer.
Showing posts with label process. Show all posts
Monday, October 20, 2014
Sunday, February 3, 2013
How to Make a 3D Wiggle Gif
I had a request for an explanation on how I made this 3d gif:
Its pretty easy to do a simple gif similar to the one above. I used Photoshop but really all you need is something that can combine images into gifs.
Step 1 Create Your Layers
The basic idea is that you are animating layers in Photoshop to create the illusion of depth by simulating what each eye might see in stereovision. The layers should represent things that are in front and behind other things in space. In my example I had 3 layers, the skull is in the foreground, the swirls are in the mid ground, and the circle is in the background. I drew these 3 images on separate pieces of paper, photographed them, and then erased everything around them in Photoshop so that each image had transparency around it.
Step 2 Combine Your Layers
Copy each of the images into one Photoshop doc, ordering them on different layers. The top layer should be what is closest and the next layer should be what is directly behind that and so on.
Step 3 Make Shadows
Duplicate each layer except the bottom one, use the contrast tool to make it black, blur it by about 3 pixels or whatever is appropriate to your image and then adjust the opacity to get a look you like. These shadow layers should be grouped with the layer that they are being cast on and they should always be sitting on top of a lower layer. No floating shadows! After this is done I like to group my layers for animation.
Right click on the layer and choose "Duplicate Layer..."
"Image->Adjustments->Brightness/Contrast"
"Filter->Blur->Gaussian Blur..."
Step 4 Animate It!
Turn on the animation timeline. Go to "Window->Animate", this will open up the animation timeline. The little thumbnail of your artwork represents one frame in your animation. The rate at which your animation will play is under that thumbnail and how your animation loops can be changed by the drop down below that. Now that your layers all are set up, duplicate the first frame. I like to keep the first frame clean of any changes, Photoshop's animation functionality isn't the most refined and you can quickly confuse yourself. Since this animation is really simulating the view from a pair of eyes, you only need two frames that swap off, looping forever.
In the second frame, move the top layer to the right 1 pixel and the bottom layer left 1 pixel, keeping the middle layer in the same spot. This could be different for your individual image and the look you are going for but its a good place to start. Now make sure that the time is set to 0.1 sec, and it is looping forever. You can test your gif out by hitting the play button. If it looks good go to File>Save for Web and devices, set it the preset to "GIF 128 Dithered" and double check your animation settings in the bottom right of the popup.
This should give you a simple wiggle gif. The nature of this technique gives you a very "card-y" 3d gif. If something was truly in stereo, each eye would see something a little different, more of one side of the skull for example. That is a bit more tricky and would require careful drawing of two images for one object, renders from a 3d application, or photos taken from two cameras or a stereo camera. If anyone has questions or comments I'd be happy to answer anything in the comments. Thanks!
Its pretty easy to do a simple gif similar to the one above. I used Photoshop but really all you need is something that can combine images into gifs.
Step 1 Create Your Layers
The basic idea is that you are animating layers in Photoshop to create the illusion of depth by simulating what each eye might see in stereovision. The layers should represent things that are in front and behind other things in space. In my example I had 3 layers, the skull is in the foreground, the swirls are in the mid ground, and the circle is in the background. I drew these 3 images on separate pieces of paper, photographed them, and then erased everything around them in Photoshop so that each image had transparency around it.
Step 2 Combine Your Layers
Copy each of the images into one Photoshop doc, ordering them on different layers. The top layer should be what is closest and the next layer should be what is directly behind that and so on.
Step 3 Make Shadows
Duplicate each layer except the bottom one, use the contrast tool to make it black, blur it by about 3 pixels or whatever is appropriate to your image and then adjust the opacity to get a look you like. These shadow layers should be grouped with the layer that they are being cast on and they should always be sitting on top of a lower layer. No floating shadows! After this is done I like to group my layers for animation.
Right click on the layer and choose "Duplicate Layer..."
"Image->Adjustments->Brightness/Contrast"
"Filter->Blur->Gaussian Blur..."
Step 4 Animate It!
Turn on the animation timeline. Go to "Window->Animate", this will open up the animation timeline. The little thumbnail of your artwork represents one frame in your animation. The rate at which your animation will play is under that thumbnail and how your animation loops can be changed by the drop down below that. Now that your layers all are set up, duplicate the first frame. I like to keep the first frame clean of any changes, Photoshop's animation functionality isn't the most refined and you can quickly confuse yourself. Since this animation is really simulating the view from a pair of eyes, you only need two frames that swap off, looping forever.
In the second frame, move the top layer to the right 1 pixel and the bottom layer left 1 pixel, keeping the middle layer in the same spot. This could be different for your individual image and the look you are going for but its a good place to start. Now make sure that the time is set to 0.1 sec, and it is looping forever. You can test your gif out by hitting the play button. If it looks good go to File>Save for Web and devices, set it the preset to "GIF 128 Dithered" and double check your animation settings in the bottom right of the popup.
This should give you a simple wiggle gif. The nature of this technique gives you a very "card-y" 3d gif. If something was truly in stereo, each eye would see something a little different, more of one side of the skull for example. That is a bit more tricky and would require careful drawing of two images for one object, renders from a 3d application, or photos taken from two cameras or a stereo camera. If anyone has questions or comments I'd be happy to answer anything in the comments. Thanks!
Saturday, June 30, 2012
Monday, April 25, 2011
Dragon Dome
I had a bit of time to work on the sculpt and texture of the dragon. I was going to use Mari for the texture but my tablet wouldn't work properly in the painting view. :( So back to ZBrush's ridiculous interface.

Also, because these are triple boot machines with Mac keyboards that refuse to screencap using every button combination known to man, it took me about as long to take that picture as it did to paint the dragon. ("Snip" ftw)

Also, because these are triple boot machines with Mac keyboards that refuse to screencap using every button combination known to man, it took me about as long to take that picture as it did to paint the dragon. ("Snip" ftw)
Sunday, November 21, 2010
Updated Pandora Rough Cut
All shots have been finished to a degree. I didn't get a chance to make too many changes to the rendered shots I had last week. Instead, I went ahead and finished most of the animation. All that is left, aside from rerendering the entire animation fixing all of the problems, is to get in some run cycles for the smoke monsters chasing the little dudes. Additionally I have to render out all of the smoke. You can see on the shot of the close up of the hero opening the box that the smoke doesn't match up to the geometry. I suspect it is a difference in the way that cameras are handled between Maya and Houdini. Some of the middle shots won't make too much sense the way they are now. I know. I wanted to get the Maya renders out as soon as I could so that I could see them in motion and see what I need to fix.
The only nagging worry I have is that I still have not found a way to comp the shadow monsters coming out of the columns. Chris pointed me to "Deep Camera Maps" in Houdini but it took over an hour to render one frame... and there isn't much support on the topic in the Houdini community. I haven't had much time to devote to it but obviously I'll get to it in the coming week.
YouTube Link to a larger version of the above.
The only nagging worry I have is that I still have not found a way to comp the shadow monsters coming out of the columns. Chris pointed me to "Deep Camera Maps" in Houdini but it took over an hour to render one frame... and there isn't much support on the topic in the Houdini community. I haven't had much time to devote to it but obviously I'll get to it in the coming week.
YouTube Link to a larger version of the above.
Sunday, November 14, 2010
Updated Previs
I updated the previs with rendered shots that I animated this weekend. Watching it right now I realized that I left out a shot of the previs. There is a reaction shot after the shadow monsters emerge from their smoke columns. Also I haven't updated the camera on the opening shot or the shadow monster crowd reveal, the one non rendered one after the columns hit. I am working on that shot now.
The second shot is probably too long. I showed it to some people and there seemed to be some agreement, and I agree, that I didn't really need that last shot. I could have the "No Fishing" sign reveal on the shot preceding it but facing the camera and towards the water.
If you have any crits I'd be more than happy to hear them. I'll be AMDO over the course of next week. I'm trying to have all the major animation done before Thanksgiving. Hopefully giving me two weeks for rendering and comp.
The second shot is probably too long. I showed it to some people and there seemed to be some agreement, and I agree, that I didn't really need that last shot. I could have the "No Fishing" sign reveal on the shot preceding it but facing the camera and towards the water.
If you have any crits I'd be more than happy to hear them. I'll be AMDO over the course of next week. I'm trying to have all the major animation done before Thanksgiving. Hopefully giving me two weeks for rendering and comp.
Monday, November 8, 2010
Camera Update and Timing
I went back into a shot that I will be animating this coming week. In order to get all of the smoke effects rolling I need to animate all of the shadow monsters. I want to get all of my camera work nailed down as soon as possible, especially for the effects shots so I went back into the full reveal of the shadow monsters and updated the camera move and timed it out better than what was in the older previs.
This is the overhead shot that immediately follows the above shot. This will be where a Massive sim comes in. I wanted to time this out so I get get some obj sequences into massive to do the "panic" sim.
This puts me at two primary Massive shots. The first is the opening shot of the town where they will be walking around and idling. The second is the above shot. There may be other opportunities for more, for example the moving shot of the columns coming down, they'd be running away. Shots like that secondary though because there would only be one or two of the Massive agents in view of the camera.
Old Previs
This is the overhead shot that immediately follows the above shot. This will be where a Massive sim comes in. I wanted to time this out so I get get some obj sequences into massive to do the "panic" sim.
This puts me at two primary Massive shots. The first is the opening shot of the town where they will be walking around and idling. The second is the above shot. There may be other opportunities for more, for example the moving shot of the columns coming down, they'd be running away. Shots like that secondary though because there would only be one or two of the Massive agents in view of the camera.
Old Previs
Sunday, November 7, 2010
Smoke Column Viewport Render
A viewport render from my smoke sim. The shot opens with Fisher opening up the box (he hasn't been animated yet) and the smoke columns shoot out and land. The Shadow monsters haven't been simmed out for this shot yet and they won't be visible until the smoke hits the ground.
Massive is going fairly well. I am pretty comfortable with my opening town sim when the townspeople are just milling about. Other than the one agent that decided to stop, turn directly towards the camera, and wave for about 30 seconds, the agents behave as expected. The "panic" mode part of the sim isn't perfect yet. They tend to ignore the painted boundaries and run right into the water or through buildings.
URL for the video if it doesn't work: http://www.youtube.com/watch?v=5MRqjYoY3SY
Massive is going fairly well. I am pretty comfortable with my opening town sim when the townspeople are just milling about. Other than the one agent that decided to stop, turn directly towards the camera, and wave for about 30 seconds, the agents behave as expected. The "panic" mode part of the sim isn't perfect yet. They tend to ignore the painted boundaries and run right into the water or through buildings.
URL for the video if it doesn't work: http://www.youtube.com/watch?v=5MRqjYoY3SY
Tuesday, November 2, 2010
Massive Trouble
By Sunday I had finished the bulk of my animations and then on Monday I wanted to get them into Massive. When I switched from shadow monsters to townspeople for the Massive sim I tested out the townsperson rig in Massive with a quick animation. He seemed to hop along fine. When I imported my run into Massive it looked ok at first glance. The animation played properly but was jumping back t the origin. No problem, I thought,just need to set it up to loop. So I got the animation trimmed down and blended so it looked smooth. But when I took the camera off of "follow" mode I quickly realized that something was terribly wrong. He would run forward through the loop but when he reached the end of the loop e would get pulled back. Its important to note that he would get pulled back but not to the origin. As it turns out his axis moves slowly along in the z direction while the character moves quickly. So when he reaches the end of his loop he gets yanked back to the axis, which has only moved a little.
I spent a great deal of (frustrating) time yesterday trying everything that I could think of to fix this but nothing seemed to work. What drives me crazy is that the hop test worked properly with no issues but the animation that I spent two days on won't work.
In other news, here is a render of a couple of shadow monsters.

*EDIT: OK, they work now. Apparently I was just doing it wrong.
I spent a great deal of (frustrating) time yesterday trying everything that I could think of to fix this but nothing seemed to work. What drives me crazy is that the hop test worked properly with no issues but the animation that I spent two days on won't work.
In other news, here is a render of a couple of shadow monsters.

*EDIT: OK, they work now. Apparently I was just doing it wrong.
Sunday, October 31, 2010
Massive Cycles
Now that I've officially switched the crowd from the shadow monsters to townspeople I had a whole new set of animations to get ready for Massive. This is a playblast of the carver rig going through the following cycles: standing still to run, run, run to walk, walk, walk to stop, 5 or 6 idles, and standing still to walk. Additionally I have turns for both walking and running, and a walk to run. This completes the basic motions for the towns people crowd. I will add more as needed.
For the remainder of the week, I'll be working on getting smoke sims set up and getting my completed animations into massive.
Sunday, October 24, 2010
Shadow Monster R&D and Test Renders
In Massive class last Wednesday, Chris mentioned that exporting deforming geometry in fbxs was going to be a problem. I needed it because I was going to be rendering the shadow monster crowd sim in Houdini after doing the volume simulation on it. As a fix he recommended breaking apart every limb and section on the shadow monsters and then parenting each individual to the rig. After doing this, animating a stand up sequence, and then running a volume sim on it I decided that the smoke covers up most of the noticeable seams on the joints and this will be a workable solution. I went ahead and animated a run and a walk with the broken limb rig.
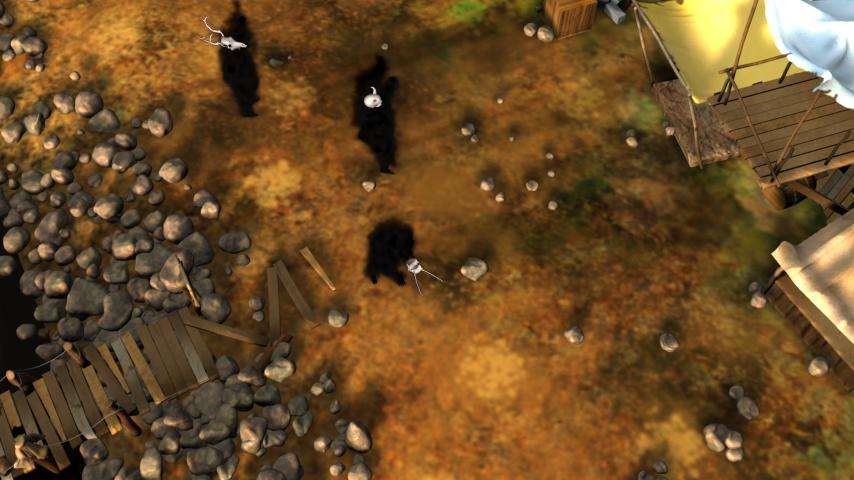
The animation isn't perfect on the characters but it should be sufficient for the shots that I need. There are a total of four shots with shadow monsters in it. The first is the shot where they materialize out of the smoke columns, the second is where they assemble, cheer and then begin their run, the next is the birds eye view of the monsters causing mayhem in the town and the final shot is where one shadow monster chases a townsperson across the scene. Only two of the shots are crowd sims. I decided that it would be easier to hand animate the shadow monsters materializing from the columns. Since the frames will have to be reversed, trying to fit Massive into the effect will be far more trouble than it is worth. I'll be able to place the massive agents to match up with the hand animated characters using Chris's Houdini script. I've got points in Houdini with the normals facing in the right direction in preparation for placing them in Massive.
I am getting pretty happy with the smoke effects. The shader needs to be tweaked a bit. Right now there is a tiny bit too much fine noise. Maybe animating the offset of it will help to make it look a little more believable.
Higher quality versions of those are here and here.
I've modeled three more skull variations bring me to a total of 10 and probably the number of shadow monsters in my crowd. The two curved horned human variation will be the Hero shadow monster.


Dirtied up Fisher's vest a little.

Rendered a sequence from the first camera to test the water's wave speed. The water looks like it is moving a bit slow with the amplitude as high as it is. I'll need to refine this a bit more. Additionally there is some flickering in the water on the right side of the clip that I'll have to look into.
A note about the farm. I rendered this sequence on the farm and I was getting 1 to 3 minute renders. However, when one of the render machines got to a certain point (frame 40 or so) it just gave up. It didn't stop rendering but my render times shot up to 10 to 20 minutes and eventually 4 to 5 hours for no reason at all. The those frames are no different than any of the other ones. I suspect if I was to kill the job and then restart it the remaining 2 frames would take two minutes to render instead of six hours.
The animation isn't perfect on the characters but it should be sufficient for the shots that I need. There are a total of four shots with shadow monsters in it. The first is the shot where they materialize out of the smoke columns, the second is where they assemble, cheer and then begin their run, the next is the birds eye view of the monsters causing mayhem in the town and the final shot is where one shadow monster chases a townsperson across the scene. Only two of the shots are crowd sims. I decided that it would be easier to hand animate the shadow monsters materializing from the columns. Since the frames will have to be reversed, trying to fit Massive into the effect will be far more trouble than it is worth. I'll be able to place the massive agents to match up with the hand animated characters using Chris's Houdini script. I've got points in Houdini with the normals facing in the right direction in preparation for placing them in Massive.
I am getting pretty happy with the smoke effects. The shader needs to be tweaked a bit. Right now there is a tiny bit too much fine noise. Maybe animating the offset of it will help to make it look a little more believable.
Higher quality versions of those are here and here.
I've modeled three more skull variations bring me to a total of 10 and probably the number of shadow monsters in my crowd. The two curved horned human variation will be the Hero shadow monster.


Dirtied up Fisher's vest a little.

Rendered a sequence from the first camera to test the water's wave speed. The water looks like it is moving a bit slow with the amplitude as high as it is. I'll need to refine this a bit more. Additionally there is some flickering in the water on the right side of the clip that I'll have to look into.
A note about the farm. I rendered this sequence on the farm and I was getting 1 to 3 minute renders. However, when one of the render machines got to a certain point (frame 40 or so) it just gave up. It didn't stop rendering but my render times shot up to 10 to 20 minutes and eventually 4 to 5 hours for no reason at all. The those frames are no different than any of the other ones. I suspect if I was to kill the job and then restart it the remaining 2 frames would take two minutes to render instead of six hours.
Tuesday, October 19, 2010
Smoke Trail Test
Houdini viewport render of the smoke trail effect for when the shadow monsters come out of the box. In terms of shape and look this is getting fairly close to what I am looking for. I'm thinking I'll need to enlarge the end of the smoke column as it reaches the ground to accommodate the shadow monsters rising from the ground. Depending on the renders it may need to be denser as well. I still need to Up Res it and shade it properly.
Cork Bobber
Monday, October 18, 2010
Skull Variation
Sunday, October 17, 2010
Texture Tests


Two quick renders of the environment with some textures and basic lighting. The render settings are pretty low for them and the textures are only at about 60 - 70% complete. I will use matte paintings for the more distant backgrounds in the compositing stage at the end of the project. I'd like to get some haze and some particles floating about the air to give the scene some atmosphere and of course volume rays if I have time.

A render of the fisherman with a slightly updated texture map from the Carver. I might add more fur in different parts of the body like the arms and chest. Obviously the pipe and hat have yet to be surfaced and I am planning on modeling him some makeshift glasses.
Monday, October 11, 2010
Shadow Monster Rigging
The bones have been placed and I am currently working on skinning him. Maya 2011 has new skin weighting tools so I decided to switch to 2011 for just that part. I've already tested out exporting the weight map and bringing it back into Maya 2010 and I feel comfortable that this is the best way to complete the skinned rig. Luckily the skinning doesn't have to be perfect as the character will be flat shaded and blurry/smokey.
Thursday, October 7, 2010
Pandora Preproduction: Scene Modeling
The scene is at roughly 85 to 95% complete. This is a rough estimate because the rest of the modeling will be dependent on how the renders look once there are textures and animation in the scene. The rest of the set modeling will be done on an as needed basis when I get to the animation and rendering stages.


Wednesday, October 6, 2010
Pandora Preproduction: Refined Previs
Taking into account many of the critiques I got over the last week I refined the story a bit. The previs is still fairly rough but is sufficient to show the shots in sequence.
I received a lot of good advice over the week but ultimately I decided to keep the actions simple. My weakest part is my character animation so I decided to minimize that aspect without ruining the story. The biggest change was keeping the character on the initial part of the dock after he releases the shadow army instead of returning to the end of the dock and continuing to fish. Instead he watches as another villager runs by in fear from a shadow monster. This is what prompts him to kick the box off the dock. The end closes with the fisherman looking at the "no fishing" sign that was just revealed by the shockwave of a big explosion.
I had received some good feedback about modifying the story so that the fisherman was unaware the whole time of what he unwittingly unleashed upon the world. However, upon reflection on how long I would need to complete the character animation I soon realized that it was not within the scope of this term.
PREVIS
I received a lot of good advice over the week but ultimately I decided to keep the actions simple. My weakest part is my character animation so I decided to minimize that aspect without ruining the story. The biggest change was keeping the character on the initial part of the dock after he releases the shadow army instead of returning to the end of the dock and continuing to fish. Instead he watches as another villager runs by in fear from a shadow monster. This is what prompts him to kick the box off the dock. The end closes with the fisherman looking at the "no fishing" sign that was just revealed by the shockwave of a big explosion.
I had received some good feedback about modifying the story so that the fisherman was unaware the whole time of what he unwittingly unleashed upon the world. However, upon reflection on how long I would need to complete the character animation I soon realized that it was not within the scope of this term.
PREVIS
Tuesday, October 5, 2010
Model Update
A work in progress of the village. Only the front three buildings will be fully modeled. The rest of the village will be matte paintings.

The shadow monster without any of his skulls or armor. The character will be rigged and his props will be randomly applied through massive for the crowd shots.

One of the heads for the shadow monsters. There will be two or three more of these to be assigned to the crowd.

The dock where the animation begins and ends.

The shadow monster without any of his skulls or armor. The character will be rigged and his props will be randomly applied through massive for the crowd shots.

One of the heads for the shadow monsters. There will be two or three more of these to be assigned to the crowd.

The dock where the animation begins and ends.
Subscribe to:
Posts (Atom)