All shots have been finished to a degree. I didn't get a chance to make too many changes to the rendered shots I had last week. Instead, I went ahead and finished most of the animation. All that is left, aside from rerendering the entire animation fixing all of the problems, is to get in some run cycles for the smoke monsters chasing the little dudes. Additionally I have to render out all of the smoke. You can see on the shot of the close up of the hero opening the box that the smoke doesn't match up to the geometry. I suspect it is a difference in the way that cameras are handled between Maya and Houdini. Some of the middle shots won't make too much sense the way they are now. I know. I wanted to get the Maya renders out as soon as I could so that I could see them in motion and see what I need to fix.
The only nagging worry I have is that I still have not found a way to comp the shadow monsters coming out of the columns. Chris pointed me to "Deep Camera Maps" in Houdini but it took over an hour to render one frame... and there isn't much support on the topic in the Houdini community. I haven't had much time to devote to it but obviously I'll get to it in the coming week.
YouTube Link to a larger version of the above.

Sunday, November 21, 2010
Sunday, November 14, 2010
Updated Previs
I updated the previs with rendered shots that I animated this weekend. Watching it right now I realized that I left out a shot of the previs. There is a reaction shot after the shadow monsters emerge from their smoke columns. Also I haven't updated the camera on the opening shot or the shadow monster crowd reveal, the one non rendered one after the columns hit. I am working on that shot now.
The second shot is probably too long. I showed it to some people and there seemed to be some agreement, and I agree, that I didn't really need that last shot. I could have the "No Fishing" sign reveal on the shot preceding it but facing the camera and towards the water.
If you have any crits I'd be more than happy to hear them. I'll be AMDO over the course of next week. I'm trying to have all the major animation done before Thanksgiving. Hopefully giving me two weeks for rendering and comp.
Tuesday, November 9, 2010
No Shaders
My Massive sim imported into the opening scene and rendered:

Obviously they don't have a shader but I'm not sure why... I have a shader from slim that should be rendering but Maya can't find it for some reason.

Obviously they don't have a shader but I'm not sure why... I have a shader from slim that should be rendering but Maya can't find it for some reason.
Monday, November 8, 2010
Camera Update and Timing
I went back into a shot that I will be animating this coming week. In order to get all of the smoke effects rolling I need to animate all of the shadow monsters. I want to get all of my camera work nailed down as soon as possible, especially for the effects shots so I went back into the full reveal of the shadow monsters and updated the camera move and timed it out better than what was in the older previs.
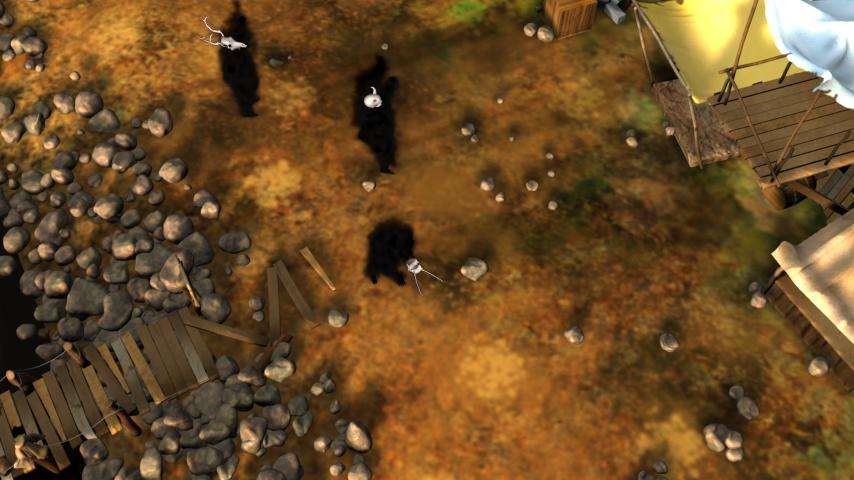
This is the overhead shot that immediately follows the above shot. This will be where a Massive sim comes in. I wanted to time this out so I get get some obj sequences into massive to do the "panic" sim.
This puts me at two primary Massive shots. The first is the opening shot of the town where they will be walking around and idling. The second is the above shot. There may be other opportunities for more, for example the moving shot of the columns coming down, they'd be running away. Shots like that secondary though because there would only be one or two of the Massive agents in view of the camera.
Old Previs
Sunday, November 7, 2010
Smoke Column Viewport Render
A viewport render from my smoke sim. The shot opens with Fisher opening up the box (he hasn't been animated yet) and the smoke columns shoot out and land. The Shadow monsters haven't been simmed out for this shot yet and they won't be visible until the smoke hits the ground.
Massive is going fairly well. I am pretty comfortable with my opening town sim when the townspeople are just milling about. Other than the one agent that decided to stop, turn directly towards the camera, and wave for about 30 seconds, the agents behave as expected. The "panic" mode part of the sim isn't perfect yet. They tend to ignore the painted boundaries and run right into the water or through buildings.
URL for the video if it doesn't work: http://www.youtube.com/watch?v=5MRqjYoY3SY
Tuesday, November 2, 2010
Massive Trouble
By Sunday I had finished the bulk of my animations and then on Monday I wanted to get them into Massive. When I switched from shadow monsters to townspeople for the Massive sim I tested out the townsperson rig in Massive with a quick animation. He seemed to hop along fine. When I imported my run into Massive it looked ok at first glance. The animation played properly but was jumping back t the origin. No problem, I thought,just need to set it up to loop. So I got the animation trimmed down and blended so it looked smooth. But when I took the camera off of "follow" mode I quickly realized that something was terribly wrong. He would run forward through the loop but when he reached the end of the loop e would get pulled back. Its important to note that he would get pulled back but not to the origin. As it turns out his axis moves slowly along in the z direction while the character moves quickly. So when he reaches the end of his loop he gets yanked back to the axis, which has only moved a little.
I spent a great deal of (frustrating) time yesterday trying everything that I could think of to fix this but nothing seemed to work. What drives me crazy is that the hop test worked properly with no issues but the animation that I spent two days on won't work.
In other news, here is a render of a couple of shadow monsters.

*EDIT: OK, they work now. Apparently I was just doing it wrong.
I spent a great deal of (frustrating) time yesterday trying everything that I could think of to fix this but nothing seemed to work. What drives me crazy is that the hop test worked properly with no issues but the animation that I spent two days on won't work.
In other news, here is a render of a couple of shadow monsters.
*EDIT: OK, they work now. Apparently I was just doing it wrong.
Sunday, October 31, 2010
Massive Cycles
Now that I've officially switched the crowd from the shadow monsters to townspeople I had a whole new set of animations to get ready for Massive. This is a playblast of the carver rig going through the following cycles: standing still to run, run, run to walk, walk, walk to stop, 5 or 6 idles, and standing still to walk. Additionally I have turns for both walking and running, and a walk to run. This completes the basic motions for the towns people crowd. I will add more as needed.
For the remainder of the week, I'll be working on getting smoke sims set up and getting my completed animations into massive.
For the remainder of the week, I'll be working on getting smoke sims set up and getting my completed animations into massive.
Sunday, October 24, 2010
Shadow Monster R&D and Test Renders
In Massive class last Wednesday, Chris mentioned that exporting deforming geometry in fbxs was going to be a problem. I needed it because I was going to be rendering the shadow monster crowd sim in Houdini after doing the volume simulation on it. As a fix he recommended breaking apart every limb and section on the shadow monsters and then parenting each individual to the rig. After doing this, animating a stand up sequence, and then running a volume sim on it I decided that the smoke covers up most of the noticeable seams on the joints and this will be a workable solution. I went ahead and animated a run and a walk with the broken limb rig.
The animation isn't perfect on the characters but it should be sufficient for the shots that I need. There are a total of four shots with shadow monsters in it. The first is the shot where they materialize out of the smoke columns, the second is where they assemble, cheer and then begin their run, the next is the birds eye view of the monsters causing mayhem in the town and the final shot is where one shadow monster chases a townsperson across the scene. Only two of the shots are crowd sims. I decided that it would be easier to hand animate the shadow monsters materializing from the columns. Since the frames will have to be reversed, trying to fit Massive into the effect will be far more trouble than it is worth. I'll be able to place the massive agents to match up with the hand animated characters using Chris's Houdini script. I've got points in Houdini with the normals facing in the right direction in preparation for placing them in Massive.
I am getting pretty happy with the smoke effects. The shader needs to be tweaked a bit. Right now there is a tiny bit too much fine noise. Maybe animating the offset of it will help to make it look a little more believable.
Higher quality versions of those are here and here.
I've modeled three more skull variations bring me to a total of 10 and probably the number of shadow monsters in my crowd. The two curved horned human variation will be the Hero shadow monster.


Dirtied up Fisher's vest a little.

Rendered a sequence from the first camera to test the water's wave speed. The water looks like it is moving a bit slow with the amplitude as high as it is. I'll need to refine this a bit more. Additionally there is some flickering in the water on the right side of the clip that I'll have to look into.
A note about the farm. I rendered this sequence on the farm and I was getting 1 to 3 minute renders. However, when one of the render machines got to a certain point (frame 40 or so) it just gave up. It didn't stop rendering but my render times shot up to 10 to 20 minutes and eventually 4 to 5 hours for no reason at all. The those frames are no different than any of the other ones. I suspect if I was to kill the job and then restart it the remaining 2 frames would take two minutes to render instead of six hours.
Tuesday, October 19, 2010
Smoke Trail Test
Houdini viewport render of the smoke trail effect for when the shadow monsters come out of the box. In terms of shape and look this is getting fairly close to what I am looking for. I'm thinking I'll need to enlarge the end of the smoke column as it reaches the ground to accommodate the shadow monsters rising from the ground. Depending on the renders it may need to be denser as well. I still need to Up Res it and shade it properly.
Cork Bobber

Procedural cork in slim with an image map for the red line. Thanks to Dan for helping me to implement the clamp function for the displacement.
Monday, October 18, 2010
Skull Variation
The crowd shots will have at least 6 different heads. I made one base skull and then modeled interchangeable horn/antlers that fits into the skull. Perhaps not always anatomically correct according to the skull but it should do for a crowd.


Sunday, October 17, 2010
Fisher Texture Update

Thought I'd update this real quick... thinking about dirtying his vest a little.
Texture Tests


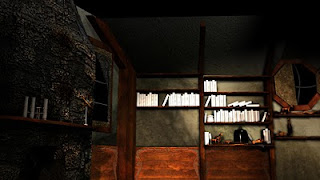
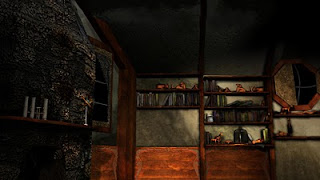
Two quick renders of the environment with some textures and basic lighting. The render settings are pretty low for them and the textures are only at about 60 - 70% complete. I will use matte paintings for the more distant backgrounds in the compositing stage at the end of the project. I'd like to get some haze and some particles floating about the air to give the scene some atmosphere and of course volume rays if I have time.

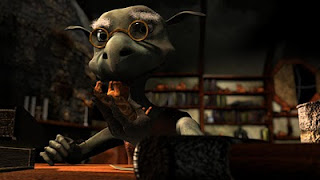
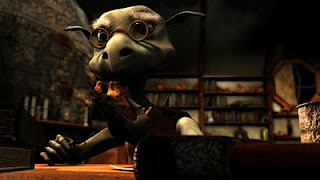
A render of the fisherman with a slightly updated texture map from the Carver. I might add more fur in different parts of the body like the arms and chest. Obviously the pipe and hat have yet to be surfaced and I am planning on modeling him some makeshift glasses.
Tuesday, October 12, 2010
New Skull
I modeled this last week but just now remembered to post it here. I'm planning on doing two or three more skulls to add variation to the shadow army. I'll probably get in a deer skull, a bull skull, and maybe a cat skull. I'm making these shadow parts interchangeable to be fed into Massive to vary up the armor.


Monday, October 11, 2010
Shadow Monster Rigging
The bones have been placed and I am currently working on skinning him. Maya 2011 has new skin weighting tools so I decided to switch to 2011 for just that part. I've already tested out exporting the weight map and bringing it back into Maya 2010 and I feel comfortable that this is the best way to complete the skinned rig. Luckily the skinning doesn't have to be perfect as the character will be flat shaded and blurry/smokey.


Thursday, October 7, 2010
Pandora Preproduction: Scene Modeling
The scene is at roughly 85 to 95% complete. This is a rough estimate because the rest of the modeling will be dependent on how the renders look once there are textures and animation in the scene. The rest of the set modeling will be done on an as needed basis when I get to the animation and rendering stages.


Wednesday, October 6, 2010
Pandora Preproduction: Refined Previs
Taking into account many of the critiques I got over the last week I refined the story a bit. The previs is still fairly rough but is sufficient to show the shots in sequence.
I received a lot of good advice over the week but ultimately I decided to keep the actions simple. My weakest part is my character animation so I decided to minimize that aspect without ruining the story. The biggest change was keeping the character on the initial part of the dock after he releases the shadow army instead of returning to the end of the dock and continuing to fish. Instead he watches as another villager runs by in fear from a shadow monster. This is what prompts him to kick the box off the dock. The end closes with the fisherman looking at the "no fishing" sign that was just revealed by the shockwave of a big explosion.
I had received some good feedback about modifying the story so that the fisherman was unaware the whole time of what he unwittingly unleashed upon the world. However, upon reflection on how long I would need to complete the character animation I soon realized that it was not within the scope of this term.
PREVIS
Tuesday, October 5, 2010
Model Update
A work in progress of the village. Only the front three buildings will be fully modeled. The rest of the village will be matte paintings.

The shadow monster without any of his skulls or armor. The character will be rigged and his props will be randomly applied through massive for the crowd shots.

One of the heads for the shadow monsters. There will be two or three more of these to be assigned to the crowd.

The dock where the animation begins and ends.

Sunday, October 3, 2010
Advanced CG: Mischevious Sprites
Homework assignment for Advanced CG. It was a short animation exploring visual perception and illusion. Basic idea from Molly Bang's Picture This.
Animation
Animation
Pandora Preproduction: Story Change
I wasn't very happy with my previous story idea. I didn't like the lead in and didn't know how to resolve it. I would have had to model and rig two different characters and that seemed an impossible task by myself. Therefore I changed my "wrapper" story and kept the Pandora's box core.
The hero is a slightly dull town yokel who is fishing at the start of the animation. He is starting to nod off when he gets something on his line. After a bit of a struggle he gets pulls a small evil looking box out of the water. He opens it and black smoke spills out in tendrils. Everywhere the tendrils land a shadow monster appears. Once assembled, the shadowy figures rally and go about the town, breaking things, setting buildings on fire and generally causing great mayhem. There will be a birds eye view of the town incorporating a massive simulation of the shadow monsters running through the streets and breaking things. Fire will sprout up on the buildings in the far shots. The hero is stunned by what he has caused and subtly kicks the box into the water and returns to his pier to fish wincing every time he hears an explosion or crashing sounds. The final shot is the hero sitting down in the position that he started in except in the background the town is on fire. Once he sits down a piece of debris falls from a "fishing" sign that he had been sitting next to the whole time only to reveal that the sign had said "NO fishing."
Story Boards:


PREVIS
The advantage of the new story, aside from an improved story, is that I will be repurposing the Carver rig and model. I will remove his glasses give him a hat and some other props and modify the texture but the weight painting will remain the same.
I am happy with this story and have no plans to significantly change it.
Sunday, September 26, 2010
Pandora Preproduction
I like to use mythology for inspiration when I begin thinking of a story. It gives me an idea and story elements to build from. For my combined Advanced CG and Massive project, I decided to go with the story of Pandora’s box. According to the myth, Pandora is given a jar and then told not to open it. The jar contained all the evils of the world and when she opened it they all escaped and all that was left in the jar was hope. I am adapting that basic story to fit my own needs by changing Pandora into a male anamorphic chipmunk creature and a jar into an ornate box. I have no thematic reason for changing the character from the original story beyond that I will be able to make a cuter more sympathetic chipmunk in less time than I would be able to make a human woman.
Hero Character:

Evils:

The “evils of the world” will be represented by shadowy figures wearing various skeletal armor. When the box is opened, tendrils of smoke will burst out of the opening. Each of these tendrils will form a column that when they touch down to the ground one of the Evils will emerge. The actual body of the Evils will be geometry rendered out with a constant black shader applied. In Nuke I will blur and use various noise or 2d smoke effects for an alpha of the character pass. Ideally the bodies would be volumes but the simulation time and storage would be unreasonable for the scope of the project. On top of the bodies of the Evils will be various parts of armor or skeletal objects including skulls for heads. These objects will not be blurred or shadowy. I will use Massive for the crowd shot of the Evils closing in on the Hero and to randomize the skeletal parts that they wear. There will be one main Evil that I will hand animate. For the smoke tendrils/columns I will use Houdini volumes emitted by particles following a curve. For reference I found almost the exact effect I am looking for in the Harry Potter trailer. 1:50 at this LINK.


In all there would be 4 distinct effects.
1. Smoke billowing from the box.
2. Tendrils following a curve.
3. Smoke on the impact of the tendrils.
4. The Evils dissolving into particles.
Storyboards:


PREVIS
Problems:
Scale is the main problem with this project. Each individual element is not difficult but there is a lot to handle. There are 4 main effects. I have done simple volumes tests in Houdini and I think the tendrils and smoke will be fairly simple to set up. The dissolving people should also be easy. The difficulty will lie in integrating these elements with the characters in massive and getting them to render properly. The second problem is character animation and creation. My storyboards and previs feature the Carver from an earlier project of mine not the character I described. I do not think that the Carver fits the story, he is an older character, not one that would be searching around ruins. If I decide to go with a new character that could potentially add a lot of time to production. The solution I have to that problem is to enlist outside help for the rigging of both characters. Modeling and texturing is added work but both are jobs that I do quickly, efficiently, and with pleasure. If I can not find someone to rig the characters I will switch back to the Carver and the story will take the hit. Overall scale is the last problem, I am not sure I can finish the entire piece by the end of the 11 weeks. Once I have a better idea about how I will handle the aforementioned problems I may decide to cut it down to a trailer type of animation. Right now I feel the story and character need more development at the beginning of the animation to get the viewers to care about the character.
Tuesday, September 14, 2010
Random Links
I don't usually do this but these are links that I recently liked. This is mostly so I can get back to them at some point...
Via Dave Lally: http://imc1.piccsy.com/13357-ba33a2-500-407.jpg
Dan by way of Evan?: http://www.phdcomics.com/comics.php?f=1369
and some really good music videos that I was first turned on to by Tom.
http://vimeo.com/14140965
http://vimeo.com/14141012
http://vimeo.com/14141046
http://vimeo.com/14141046
Sunday, September 12, 2010
Friday, September 3, 2010
Week 11 Final
I had two areas of interest for my New Media project this term, visual development and direction. My goals for the first part were to create a short animation with a cohesive and considered visual style that is appealing. The second focus was more of an implied goal. I wanted to bring together the talent of several people to create an animation that is bigger than I alone could have made and express my ideas clearly so that other artists could execute my vision. Along the way though I learned additional skills and techniques that I used to overcome the obstacles that I encountered.
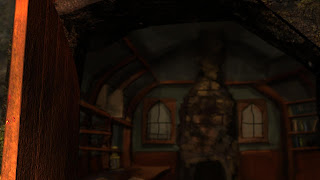
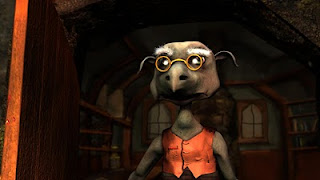
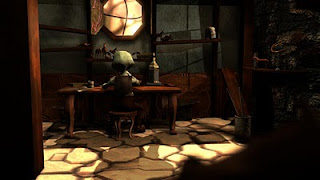
Up until a year ago I was sure I was going to be going back to school for my MFA in painting. Since then, however, my plans have changed but my artistic leanings have not. I approach all of my projects in a similar way that I would approach a painting. Of primary importance is the visual quality of the piece. How can I convey a narrative (whether it is explicit or implicit) through the image? Instead of using motion, dialogue, and other forms communication I like to focus on the what is drawn on the screen. I like to spend my time developing an intricate visual style using color, light, and form to tell a story as much as the animators convey a character's emotion. I set out to create an animation that told a short story about a wood carver that carves a creature that comes alive. A twist of the Pygmalion and Galatea story. I wanted the visual style to be reminiscent of an older painterly style. To accomplish this this I brought in several references. First and most obviously I used several painted backgrounds for different scenes. After rendering a scene I would take it into Photoshop and paint what I did not model. The best example of this is when the carver bursts through the door. Behind him is a painting I completed in Photoshop.
For the final shot I brought the background image into Photoshop and added details to the scene including grass and trees. To be able to do this I relied on a fixed camera.

The only shot that did not use a fixed camera was the second outdoor shot and the most complex and time intensive shot. Instead of painting directly on the background plate, it would have been nearly impossible with the tracking of the camera, I rendered painted backdrops behind the geometry of the scene.

I had hoped that the technique of using fixed cameras and painted backdrops would make production easier and faster. I am not convinced that this was the case though. For example, the shot I mentioned earlier of the Carver bursting through the door might have taken longer than necessary. The painting took several hours to get the way I wanted. Since I already had the geometry modeled and textured, it may not have taken me long to light and render from that angle and composit it into the background. Ultimately what I thought would save time did the opposite. For future projects I may want to completely paint every backdrop. Rather than doing double work by modeling, lighting, texturing, and rendering a scene and then doing a painting as well, I could have chosen one.

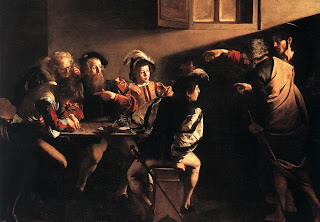
Another reference to a painting style was the use of light. In all of my animations I like to use light as a character. The light helps to tell the story much like Carravaggio used light to tell stories through his paintings. I used a light to denote "magical" events. This attention to light slowed production quite a bit though, every scene had its own individual and sometimes complex light setup.
The final way that I incorporated other types of art into my animation was through the use of paintings as source material. When I was struggling with the lighting of the outdoor shots I turned to a painting to get the idea for the quality of light.
The second aspect of the project was "direction". I wanted to create a project that was bigger than what I alone could do in a term and to be able to clearly communicate what I wanted for each shot. Since I have very little character animation experience and mine was a character piece I wanted to have character animators. Additionally, to be able to put as much time as I wanted into the look of the animation (and still have an animation as opposed to stills) I could not animate the entire animation. I developed a process for working with the animators. The first step was to create a full length previs that they could watch to get a sense of how and when things happen. Then I wrote several sentences along with approximate frame ranges to supplement the previs and get more specific about what I wanted from each shot. Next the animator would block out the shot and send it to me for approval. After I OKed that they would animate most of the big movements to get a sense of how the shot would progress. Here is where I found I gave the most suggestions for the shot. Then I would allow for one more round of changes and after the third pass I would ok everything except for the occasional small tweaks. I had to find the balance between getting the shot to look like what I had envisioned and considering the time the animator was giving me for free and the time I had left for the project. Looking back, I would have done a slightly more detailed previs with a couple of key poses for every shot. What I liked about the process was that it forced me to put into words the ideas in my head. Very often when I animate or draw or paint I have the freedom to do whatever I want without justifying it. Quite often the work is underdeveloped, I don't think about and reason through the artwork as much as I could to create a better piece.
The extra hands were very beneficial but I was reliant on their schedules and availability and ultimately they could not finish all of the shots. The first three shots in the attached not counting the paintings in the beginning my animators did the first three shots and the last four. I animated the three in the middle.
For the one main effect, Dan contributed his time to create a particle sim for the project. I had originally wanted to do the effect myself but I quickly realized at the beginning of the term that I would not have time to complete the effect with the little effects experience I have. Dan and I worked well together and our working process was a little less formal than that of the animators. Typically we would just discus what I was looking for and I would try to compare it to an effect I'd seen before. Dan would then do a sim and I would change my mind completely and he would resim again. In the end the effect came out better than I expected and I am really pleased with the outcome of the shot.
Aside from all of the conceptual material I learned, I overcame quite a few technical hurdles in the process of making the animation. This term was the first time I had made a fully skinned rig with facial features. My previous rigging experience was with robots that didn't need weighted skins or facial rigs. Though my rigging knowledge definitely increased greatly through the course of the project, it wasn't without struggle. I completed the the most technical aspect of the rigging process, the facial rig, during the time everyone was at SIGGRAPH. This meant I had no one to ask questions of when I ran into trouble. I really wanted to make a functional rig. If I was the only one animating I could have been more forgiving when creating the rig. I really didn't want to pass off a bad rig to other people. This attention to detail led to one of the biggest time sucks in the project. I spent at least two and a half weeks devoted to the rig with the occasional tweaks as the animators began animating and finding flaws in the rig.
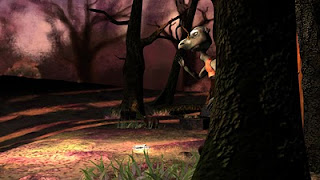
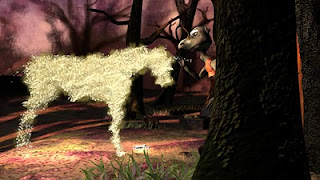
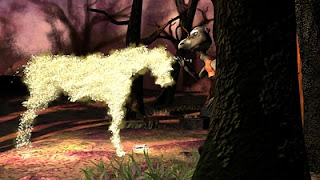
Another technical challenge I took on during the course of the animation was shader writing in SLIM. For the ground planes in the set it was unrealistic to use painted texture maps for an area of that size. I had some experience with shader writing in Renderman Shading Language and of course using the hypershade in Maya to create procedural shaders. However RSL would have been too tricky to get something working in the amount of time that I had and the hypershade did not allow the flexibility that I needed. I have a friend that works at Pixar and I had seen samples of some shaders he had written in SLIM and I was impressed. I devoted several days towards working out the nuances of SLIM but in the end I was able to come out with some really nice shaders. I wrote both of the ground shaders in SLIM and the horse shaders was a keyable shader I wrote in SLIM. While I probably could have gotten similar results in a faster amount of time I believe that the knowledge I picked up in SLIM will benefit me later. I plan to use SLIM to create more of my shaders in the future.
Procedural shader written in SLIM for the ground.
Animated shader written in SLIM for the carving.
The biggest technical hurdle I came up against was in the rendering stage. As I began rendering I found out that as is usually the case my renders were not quick. It is the price I always pay for highly detailed scenes. It didn't help that I was raytracing for quite a few of the shots. The first coupled of rendered sequences weren't too bad, around 4 or 5 minutes a frame. I hit a roadblock though when I had a scene that was taking 15 minutes a frame for a 600 frame sequence. It was particularly troubling because I wasn't even raytracing in the scene. We had render farm issues as well. When we tried to cancel jobs on the farm it would cancel the parent process but not the child process on each render box. This led to the farm filling up with dead jobs. What made this more troublesome was that Renderman for Maya uses one license per 4 threads. Many of the farm boxes were 16 threaded computers. If 4 farm computers crashed that ate up 16 out of 40 licenses in one go. My frames in particular seemed prone to crashing. After a trying to render on the the farm a couple of times and crashing out too much I made the decision to only render locally. Went through the process of writing out RIBs and trying to render directly from PRman but there seemed to be an issue with the way Maya wrote out the point cloud information that created broken paths and would error out the render. These type of troubles led me to spending a significant amount of time optimizing my renders. I spent hours tweaking settings until the shot rendered in the lowest possible time. I was able to bring some of my ray traced scenes from 10 to 15 minutes down to 3 or 4 minutes. The 600 frame scene ended up having a typo in one of the settings that caused the render time to sky-rocket and there to be splitting along the edge of the buckets of each frame. Once I fixed that render time decreased greatly.
The amount of time spent troubleshooting rendering combined with the animators doing less work than I had hoped, being absent for a week and an overly ambitious project meant that I did not finish every shot by the end of the quarter. By around week 7 I realized that I would probably not fully finish the animation so I promised the opening three shots and the final four. This was the first time I've ever attempted a term long animation and I've definitely learned a sense of scale. For the sake of completion I will finish the animation over my two week break before next term. I will animate the last couple of shots and re-render to fix the issues in the currently finished frames. (flickering shadows, dropped passes, etc.) However, considering the quality of the shots I completed I am satisfied that I achieved my core goals for the project. I created a rich visual style that I was able to carry through to an animation and I successfully communicated my ideas to other artists to carry out my vision.
animation
Up until a year ago I was sure I was going to be going back to school for my MFA in painting. Since then, however, my plans have changed but my artistic leanings have not. I approach all of my projects in a similar way that I would approach a painting. Of primary importance is the visual quality of the piece. How can I convey a narrative (whether it is explicit or implicit) through the image? Instead of using motion, dialogue, and other forms communication I like to focus on the what is drawn on the screen. I like to spend my time developing an intricate visual style using color, light, and form to tell a story as much as the animators convey a character's emotion. I set out to create an animation that told a short story about a wood carver that carves a creature that comes alive. A twist of the Pygmalion and Galatea story. I wanted the visual style to be reminiscent of an older painterly style. To accomplish this this I brought in several references. First and most obviously I used several painted backgrounds for different scenes. After rendering a scene I would take it into Photoshop and paint what I did not model. The best example of this is when the carver bursts through the door. Behind him is a painting I completed in Photoshop.


For the final shot I brought the background image into Photoshop and added details to the scene including grass and trees. To be able to do this I relied on a fixed camera.

The only shot that did not use a fixed camera was the second outdoor shot and the most complex and time intensive shot. Instead of painting directly on the background plate, it would have been nearly impossible with the tracking of the camera, I rendered painted backdrops behind the geometry of the scene.


I had hoped that the technique of using fixed cameras and painted backdrops would make production easier and faster. I am not convinced that this was the case though. For example, the shot I mentioned earlier of the Carver bursting through the door might have taken longer than necessary. The painting took several hours to get the way I wanted. Since I already had the geometry modeled and textured, it may not have taken me long to light and render from that angle and composit it into the background. Ultimately what I thought would save time did the opposite. For future projects I may want to completely paint every backdrop. Rather than doing double work by modeling, lighting, texturing, and rendering a scene and then doing a painting as well, I could have chosen one.


Another reference to a painting style was the use of light. In all of my animations I like to use light as a character. The light helps to tell the story much like Carravaggio used light to tell stories through his paintings. I used a light to denote "magical" events. This attention to light slowed production quite a bit though, every scene had its own individual and sometimes complex light setup.

The final way that I incorporated other types of art into my animation was through the use of paintings as source material. When I was struggling with the lighting of the outdoor shots I turned to a painting to get the idea for the quality of light.
The second aspect of the project was "direction". I wanted to create a project that was bigger than what I alone could do in a term and to be able to clearly communicate what I wanted for each shot. Since I have very little character animation experience and mine was a character piece I wanted to have character animators. Additionally, to be able to put as much time as I wanted into the look of the animation (and still have an animation as opposed to stills) I could not animate the entire animation. I developed a process for working with the animators. The first step was to create a full length previs that they could watch to get a sense of how and when things happen. Then I wrote several sentences along with approximate frame ranges to supplement the previs and get more specific about what I wanted from each shot. Next the animator would block out the shot and send it to me for approval. After I OKed that they would animate most of the big movements to get a sense of how the shot would progress. Here is where I found I gave the most suggestions for the shot. Then I would allow for one more round of changes and after the third pass I would ok everything except for the occasional small tweaks. I had to find the balance between getting the shot to look like what I had envisioned and considering the time the animator was giving me for free and the time I had left for the project. Looking back, I would have done a slightly more detailed previs with a couple of key poses for every shot. What I liked about the process was that it forced me to put into words the ideas in my head. Very often when I animate or draw or paint I have the freedom to do whatever I want without justifying it. Quite often the work is underdeveloped, I don't think about and reason through the artwork as much as I could to create a better piece.
The extra hands were very beneficial but I was reliant on their schedules and availability and ultimately they could not finish all of the shots. The first three shots in the attached not counting the paintings in the beginning my animators did the first three shots and the last four. I animated the three in the middle.
For the one main effect, Dan contributed his time to create a particle sim for the project. I had originally wanted to do the effect myself but I quickly realized at the beginning of the term that I would not have time to complete the effect with the little effects experience I have. Dan and I worked well together and our working process was a little less formal than that of the animators. Typically we would just discus what I was looking for and I would try to compare it to an effect I'd seen before. Dan would then do a sim and I would change my mind completely and he would resim again. In the end the effect came out better than I expected and I am really pleased with the outcome of the shot.
Aside from all of the conceptual material I learned, I overcame quite a few technical hurdles in the process of making the animation. This term was the first time I had made a fully skinned rig with facial features. My previous rigging experience was with robots that didn't need weighted skins or facial rigs. Though my rigging knowledge definitely increased greatly through the course of the project, it wasn't without struggle. I completed the the most technical aspect of the rigging process, the facial rig, during the time everyone was at SIGGRAPH. This meant I had no one to ask questions of when I ran into trouble. I really wanted to make a functional rig. If I was the only one animating I could have been more forgiving when creating the rig. I really didn't want to pass off a bad rig to other people. This attention to detail led to one of the biggest time sucks in the project. I spent at least two and a half weeks devoted to the rig with the occasional tweaks as the animators began animating and finding flaws in the rig.
Another technical challenge I took on during the course of the animation was shader writing in SLIM. For the ground planes in the set it was unrealistic to use painted texture maps for an area of that size. I had some experience with shader writing in Renderman Shading Language and of course using the hypershade in Maya to create procedural shaders. However RSL would have been too tricky to get something working in the amount of time that I had and the hypershade did not allow the flexibility that I needed. I have a friend that works at Pixar and I had seen samples of some shaders he had written in SLIM and I was impressed. I devoted several days towards working out the nuances of SLIM but in the end I was able to come out with some really nice shaders. I wrote both of the ground shaders in SLIM and the horse shaders was a keyable shader I wrote in SLIM. While I probably could have gotten similar results in a faster amount of time I believe that the knowledge I picked up in SLIM will benefit me later. I plan to use SLIM to create more of my shaders in the future.

Procedural shader written in SLIM for the ground.

Animated shader written in SLIM for the carving.
The biggest technical hurdle I came up against was in the rendering stage. As I began rendering I found out that as is usually the case my renders were not quick. It is the price I always pay for highly detailed scenes. It didn't help that I was raytracing for quite a few of the shots. The first coupled of rendered sequences weren't too bad, around 4 or 5 minutes a frame. I hit a roadblock though when I had a scene that was taking 15 minutes a frame for a 600 frame sequence. It was particularly troubling because I wasn't even raytracing in the scene. We had render farm issues as well. When we tried to cancel jobs on the farm it would cancel the parent process but not the child process on each render box. This led to the farm filling up with dead jobs. What made this more troublesome was that Renderman for Maya uses one license per 4 threads. Many of the farm boxes were 16 threaded computers. If 4 farm computers crashed that ate up 16 out of 40 licenses in one go. My frames in particular seemed prone to crashing. After a trying to render on the the farm a couple of times and crashing out too much I made the decision to only render locally. Went through the process of writing out RIBs and trying to render directly from PRman but there seemed to be an issue with the way Maya wrote out the point cloud information that created broken paths and would error out the render. These type of troubles led me to spending a significant amount of time optimizing my renders. I spent hours tweaking settings until the shot rendered in the lowest possible time. I was able to bring some of my ray traced scenes from 10 to 15 minutes down to 3 or 4 minutes. The 600 frame scene ended up having a typo in one of the settings that caused the render time to sky-rocket and there to be splitting along the edge of the buckets of each frame. Once I fixed that render time decreased greatly.
The amount of time spent troubleshooting rendering combined with the animators doing less work than I had hoped, being absent for a week and an overly ambitious project meant that I did not finish every shot by the end of the quarter. By around week 7 I realized that I would probably not fully finish the animation so I promised the opening three shots and the final four. This was the first time I've ever attempted a term long animation and I've definitely learned a sense of scale. For the sake of completion I will finish the animation over my two week break before next term. I will animate the last couple of shots and re-render to fix the issues in the currently finished frames. (flickering shadows, dropped passes, etc.) However, considering the quality of the shots I completed I am satisfied that I achieved my core goals for the project. I created a rich visual style that I was able to carry through to an animation and I successfully communicated my ideas to other artists to carry out my vision.
animation
Subscribe to:
Posts (Atom)