I had two areas of interest for my New Media project this term, visual development and direction. My goals for the first part were to create a short animation with a cohesive and considered visual style that is appealing. The second focus was more of an implied goal. I wanted to bring together the talent of several people to create an animation that is bigger than I alone could have made and express my ideas clearly so that other artists could execute my vision. Along the way though I learned additional skills and techniques that I used to overcome the obstacles that I encountered.
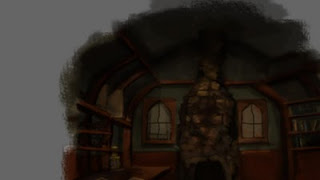
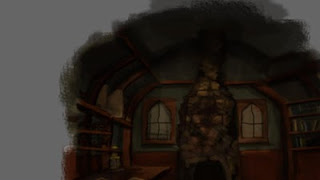
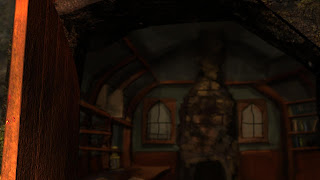
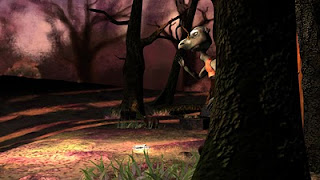
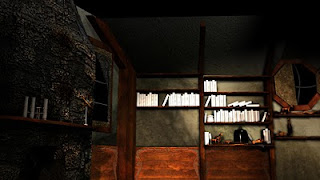
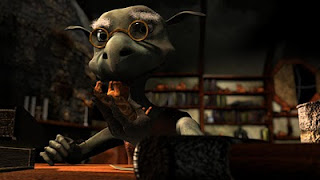
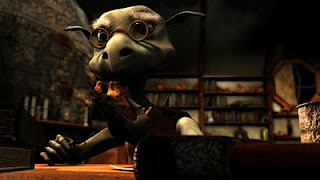
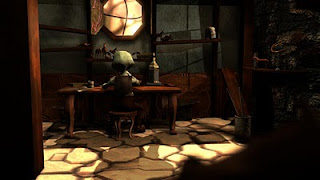
Up until a year ago I was sure I was going to be going back to school for my MFA in painting. Since then, however, my plans have changed but my artistic leanings have not. I approach all of my projects in a similar way that I would approach a painting. Of primary importance is the visual quality of the piece. How can I convey a narrative (whether it is explicit or implicit) through the image? Instead of using motion, dialogue, and other forms communication I like to focus on the what is drawn on the screen. I like to spend my time developing an intricate visual style using color, light, and form to tell a story as much as the animators convey a character's emotion. I set out to create an animation that told a short story about a wood carver that carves a creature that comes alive. A twist of the Pygmalion and Galatea story. I wanted the visual style to be reminiscent of an older painterly style. To accomplish this this I brought in several references. First and most obviously I used several painted backgrounds for different scenes. After rendering a scene I would take it into Photoshop and paint what I did not model. The best example of this is when the carver bursts through the door. Behind him is a painting I completed in Photoshop.
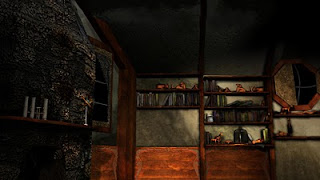
For the final shot I brought the background image into Photoshop and added details to the scene including grass and trees. To be able to do this I relied on a fixed camera.

The only shot that did not use a fixed camera was the second outdoor shot and the most complex and time intensive shot. Instead of painting directly on the background plate, it would have been nearly impossible with the tracking of the camera, I rendered painted backdrops behind the geometry of the scene.

I had hoped that the technique of using fixed cameras and painted backdrops would make production easier and faster. I am not convinced that this was the case though. For example, the shot I mentioned earlier of the Carver bursting through the door might have taken longer than necessary. The painting took several hours to get the way I wanted. Since I already had the geometry modeled and textured, it may not have taken me long to light and render from that angle and composit it into the background. Ultimately what I thought would save time did the opposite. For future projects I may want to completely paint every backdrop. Rather than doing double work by modeling, lighting, texturing, and rendering a scene and then doing a painting as well, I could have chosen one.

Another reference to a painting style was the use of light. In all of my animations I like to use light as a character. The light helps to tell the story much like Carravaggio used light to tell stories through his paintings. I used a light to denote "magical" events. This attention to light slowed production quite a bit though, every scene had its own individual and sometimes complex light setup.
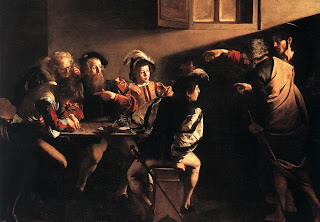
The final way that I incorporated other types of art into my animation was through the use of paintings as source material. When I was struggling with the lighting of the outdoor shots I turned to a painting to get the idea for the quality of light.
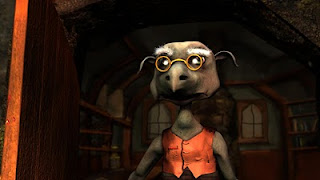
The second aspect of the project was "direction". I wanted to create a project that was bigger than what I alone could do in a term and to be able to clearly communicate what I wanted for each shot. Since I have very little character animation experience and mine was a character piece I wanted to have character animators. Additionally, to be able to put as much time as I wanted into the look of the animation (and still have an animation as opposed to stills) I could not animate the entire animation. I developed a process for working with the animators. The first step was to create a full length previs that they could watch to get a sense of how and when things happen. Then I wrote several sentences along with approximate frame ranges to supplement the previs and get more specific about what I wanted from each shot. Next the animator would block out the shot and send it to me for approval. After I OKed that they would animate most of the big movements to get a sense of how the shot would progress. Here is where I found I gave the most suggestions for the shot. Then I would allow for one more round of changes and after the third pass I would ok everything except for the occasional small tweaks. I had to find the balance between getting the shot to look like what I had envisioned and considering the time the animator was giving me for free and the time I had left for the project. Looking back, I would have done a slightly more detailed previs with a couple of key poses for every shot. What I liked about the process was that it forced me to put into words the ideas in my head. Very often when I animate or draw or paint I have the freedom to do whatever I want without justifying it. Quite often the work is underdeveloped, I don't think about and reason through the artwork as much as I could to create a better piece.
The extra hands were very beneficial but I was reliant on their schedules and availability and ultimately they could not finish all of the shots. The first three shots in the attached not counting the paintings in the beginning my animators did the first three shots and the last four. I animated the three in the middle.
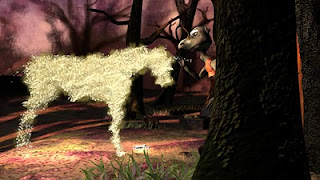
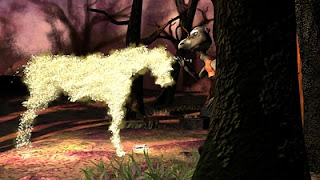
For the one main effect, Dan contributed his time to create a particle sim for the project. I had originally wanted to do the effect myself but I quickly realized at the beginning of the term that I would not have time to complete the effect with the little effects experience I have. Dan and I worked well together and our working process was a little less formal than that of the animators. Typically we would just discus what I was looking for and I would try to compare it to an effect I'd seen before. Dan would then do a sim and I would change my mind completely and he would resim again. In the end the effect came out better than I expected and I am really pleased with the outcome of the shot.
Aside from all of the conceptual material I learned, I overcame quite a few technical hurdles in the process of making the animation. This term was the first time I had made a fully skinned rig with facial features. My previous rigging experience was with robots that didn't need weighted skins or facial rigs. Though my rigging knowledge definitely increased greatly through the course of the project, it wasn't without struggle. I completed the the most technical aspect of the rigging process, the facial rig, during the time everyone was at SIGGRAPH. This meant I had no one to ask questions of when I ran into trouble. I really wanted to make a functional rig. If I was the only one animating I could have been more forgiving when creating the rig. I really didn't want to pass off a bad rig to other people. This attention to detail led to one of the biggest time sucks in the project. I spent at least two and a half weeks devoted to the rig with the occasional tweaks as the animators began animating and finding flaws in the rig.
Another technical challenge I took on during the course of the animation was shader writing in SLIM. For the ground planes in the set it was unrealistic to use painted texture maps for an area of that size. I had some experience with shader writing in Renderman Shading Language and of course using the hypershade in Maya to create procedural shaders. However RSL would have been too tricky to get something working in the amount of time that I had and the hypershade did not allow the flexibility that I needed. I have a friend that works at Pixar and I had seen samples of some shaders he had written in SLIM and I was impressed. I devoted several days towards working out the nuances of SLIM but in the end I was able to come out with some really nice shaders. I wrote both of the ground shaders in SLIM and the horse shaders was a keyable shader I wrote in SLIM. While I probably could have gotten similar results in a faster amount of time I believe that the knowledge I picked up in SLIM will benefit me later. I plan to use SLIM to create more of my shaders in the future.
Procedural shader written in SLIM for the ground.
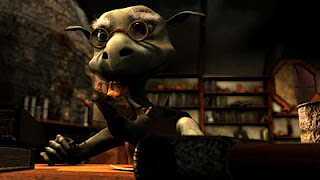
Animated shader written in SLIM for the carving.
The biggest technical hurdle I came up against was in the rendering stage. As I began rendering I found out that as is usually the case my renders were not quick. It is the price I always pay for highly detailed scenes. It didn't help that I was raytracing for quite a few of the shots. The first coupled of rendered sequences weren't too bad, around 4 or 5 minutes a frame. I hit a roadblock though when I had a scene that was taking 15 minutes a frame for a 600 frame sequence. It was particularly troubling because I wasn't even raytracing in the scene. We had render farm issues as well. When we tried to cancel jobs on the farm it would cancel the parent process but not the child process on each render box. This led to the farm filling up with dead jobs. What made this more troublesome was that Renderman for Maya uses one license per 4 threads. Many of the farm boxes were 16 threaded computers. If 4 farm computers crashed that ate up 16 out of 40 licenses in one go. My frames in particular seemed prone to crashing. After a trying to render on the the farm a couple of times and crashing out too much I made the decision to only render locally. Went through the process of writing out RIBs and trying to render directly from PRman but there seemed to be an issue with the way Maya wrote out the point cloud information that created broken paths and would error out the render. These type of troubles led me to spending a significant amount of time optimizing my renders. I spent hours tweaking settings until the shot rendered in the lowest possible time. I was able to bring some of my ray traced scenes from 10 to 15 minutes down to 3 or 4 minutes. The 600 frame scene ended up having a typo in one of the settings that caused the render time to sky-rocket and there to be splitting along the edge of the buckets of each frame. Once I fixed that render time decreased greatly.
The amount of time spent troubleshooting rendering combined with the animators doing less work than I had hoped, being absent for a week and an overly ambitious project meant that I did not finish every shot by the end of the quarter. By around week 7 I realized that I would probably not fully finish the animation so I promised the opening three shots and the final four. This was the first time I've ever attempted a term long animation and I've definitely learned a sense of scale. For the sake of completion I will finish the animation over my two week break before next term. I will animate the last couple of shots and re-render to fix the issues in the currently finished frames. (flickering shadows, dropped passes, etc.) However, considering the quality of the shots I completed I am satisfied that I achieved my core goals for the project. I created a rich visual style that I was able to carry through to an animation and I successfully communicated my ideas to other artists to carry out my vision.
animation


